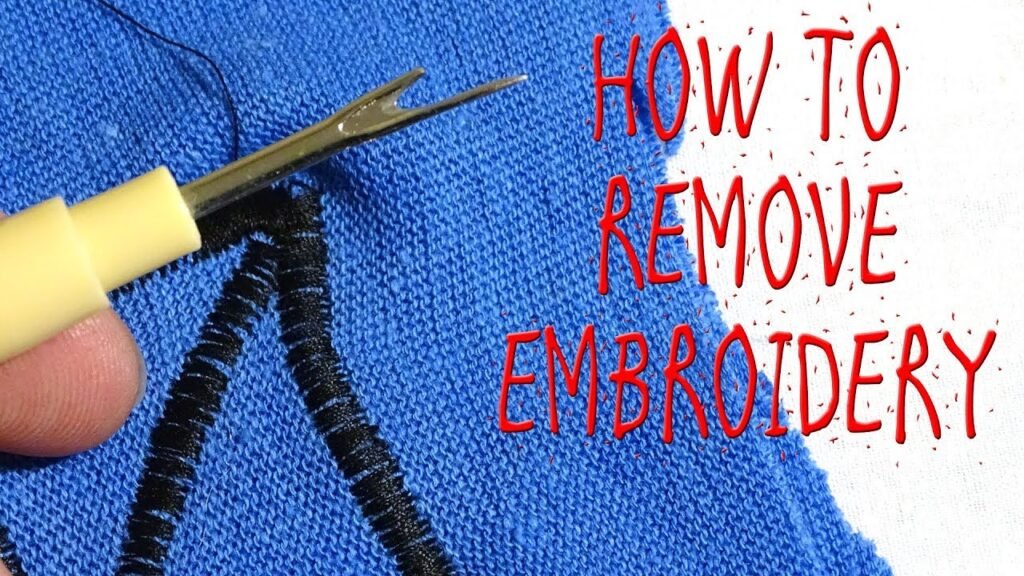
In clothing fashion sometimes you may need to remove embroidery from your clothing. So it is important to know how to remove embroidery.
In this article you will get to know how to remove embroidery in 3 ways.
Method 1
Using an Embroidery Eraser
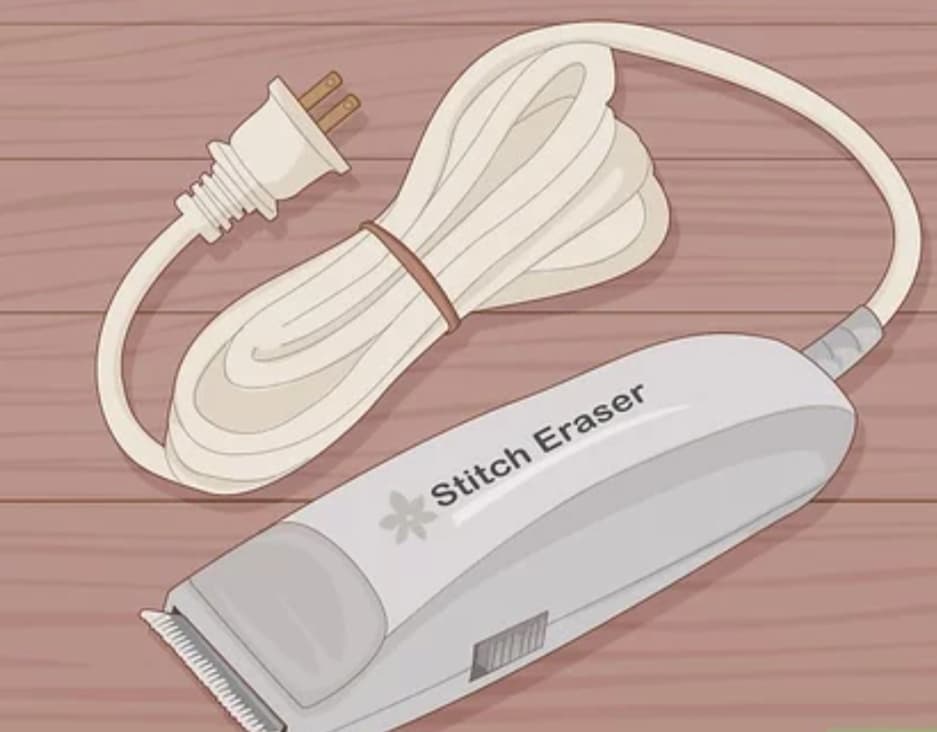
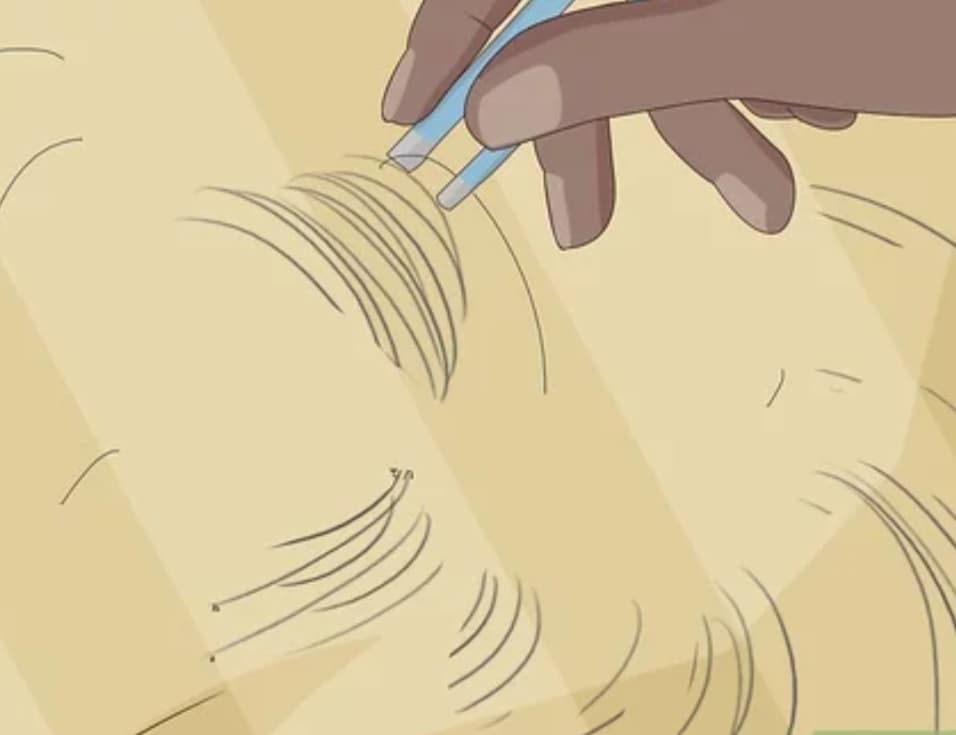
- Invest in a stitch eraser or an embroidery eraser. This item is available online or in a well-stocked fabric shop. It has the appearance of a pair of beard trimmers. It’s perfect for logos on coats, ties, and caps, as well as professional-quality embroidery.
- Hand-embroidery with a needle, thread, and an embroidery hoop is not recommended with this product.


- To expose the back of the clothing, flip it over. There’s a possibility the stitch eraser could scratch against the fabric, causing it to become fuzzy. The fuzzy texture would be noticeable if you do this on the front of the jacket. However, if you work from the back, it won’t be.
- The stabilizer could still be attached to any embroidery. Remove the stabilizer first.
- Since the embroidery is lighter on the back of the fabric, the eraser would have an easier time cutting through it.
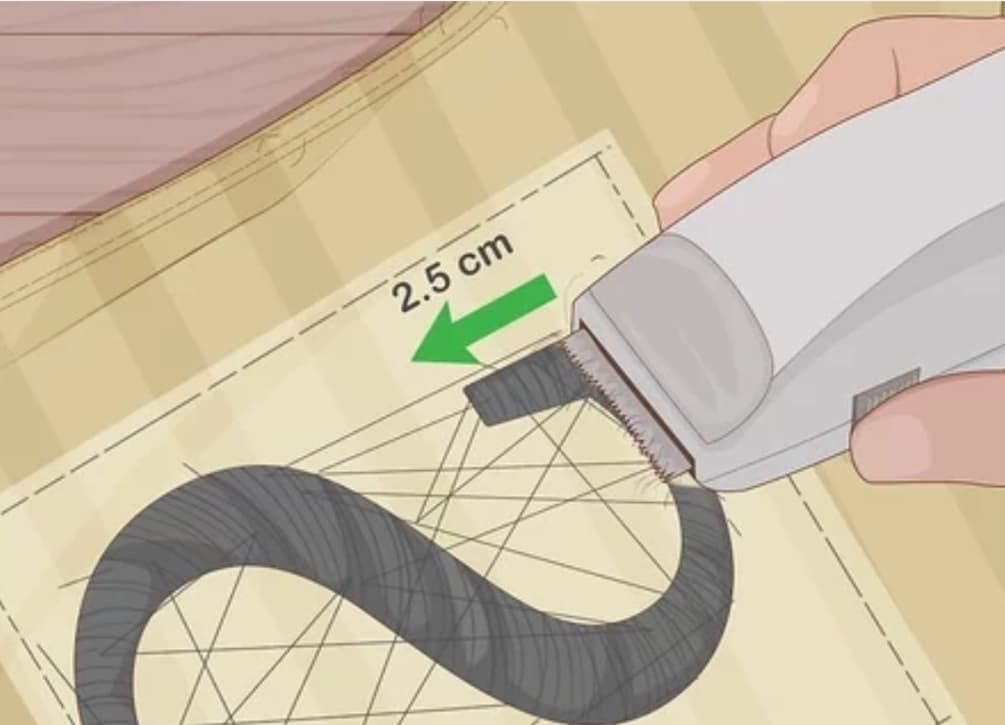
- 1 inch (2.5 cm) across the stitching with the eraser. Make sure the blades of the eraser are cutting through the threads by placing it against the edge of the embroidery. Move the eraser forward about 1 inch (2.5 cm) at a time, similar to a cart or shovel.
- If you are working on a logo, you can move the eraser across the entire width of the letter instead.
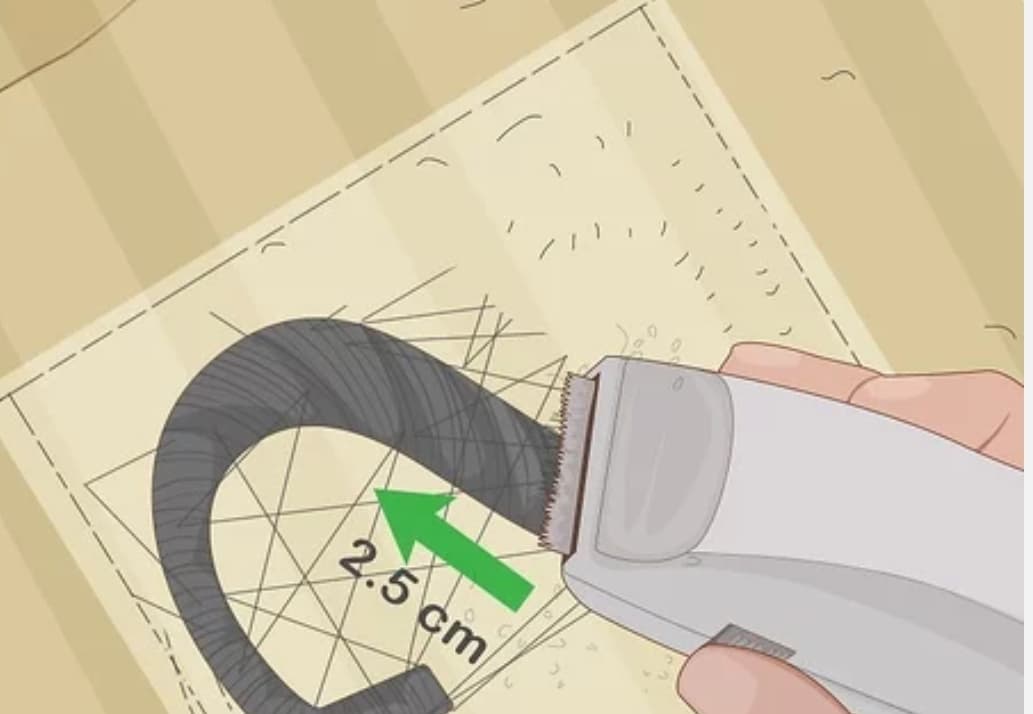
- Shift the eraser to the next section by lifting it up. Lift the eraser up again after pushing it forward another 1 inch (2.5 cm). From one hand of the embroidery to the other, work your way around the edge. Start a second 1 in (2.5 cm) row after finishing the first. Continue until you’ve removed all of the embroidery.
- Depending on the size of the embroidery, you will need to repeat this procedure several times. You would only have to do it once for a small area.
- Remove the stitches by hand from the front of your designer clothing. You may not be able to see the loosened threads because of how fine and tight the embroidery is. Use your best judgment to locate the shaved patch, then raise and pull the threads away with a darning needle or a seam ripper.
- Pull the needle or seam ripper upwards after sliding it under the stitches. Pull the threads out with your fingertips.
- To scrape off smaller stitches, run your fingernail over them.

- If necessary, repeat the procedure. Since not all of the stitches will come out on the first attempt, turn the fabric over and use your stitch eraser to remove the remaining stitches. To remove the stitches, go back to the front and pull them out.

- Remove the thread dust from the cloth with a lint roller. If you don’t have a lint roller, a piece of masking tape will suffice. Make certain you have both the front and back of the fabric.
- A few tangled threads or stitches can be discovered during this operation. In this scenario, rip them out with a seam ripper.
Method 2
Using a Seam Ripper

- To see the back of the embroidery, flip your fabric over. If it’s a real garment, you should probably turn it inside out. It is essential to start from the back. If you start from the front, you risk nicking the fabric, which will show up later.
- It’s better to re-hoop hand-embroidered pieces.
- If the stabilizer is still stuck to the back of your embroidery, you can tear it off before starting.
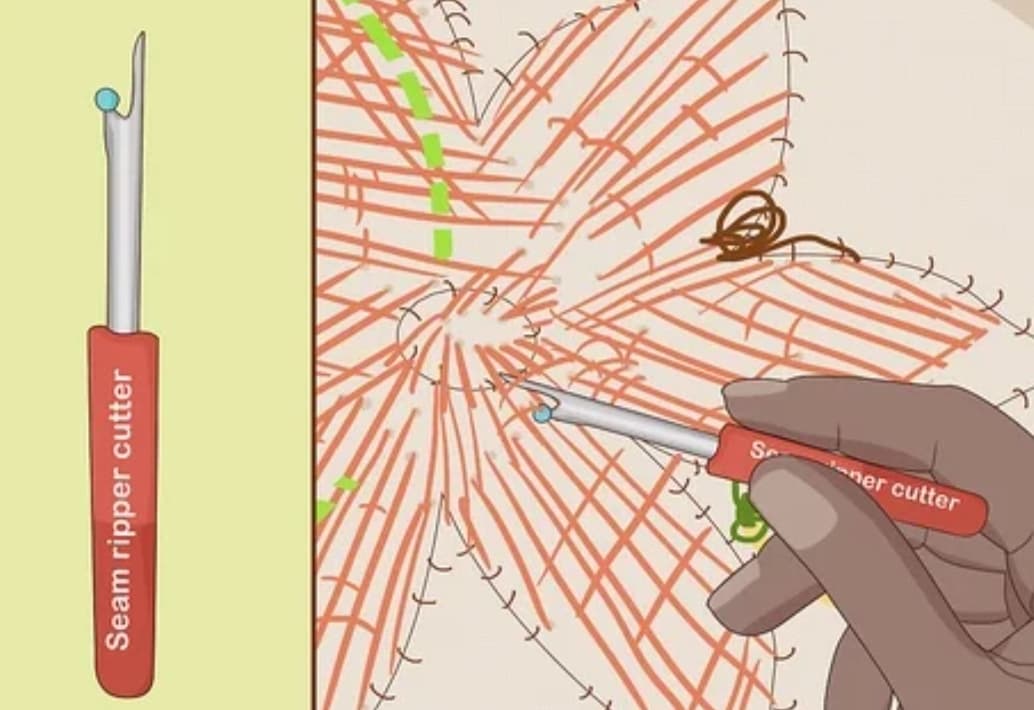
- Using a seam ripper, cut the stitches. Decide how many stitches to cut first, then slip a seam ripper under them and bring it upwards at an angle to rip them out. The threads would be cut by the blade within the hooked section of the seam ripper.
- You may use embroidery scissors or manicure scissors. Snip the threads with the tip only, being careful not to cut the fabric.
- Work just a few inches/centimeters at a time if this is a big embroidery project.
- Start with the satin stitches if you’re working on a multi-layered embroidery project.

- Return to the fabric’s front. If it’s a ready dress, simply turn it inside out. The cut threads which also begin to fray depending on the type of stitches used in the embroidery.

The stitches on the front of the cloth should be pulled out. Lift the stitches out with a darning needle slid under them. Pinch and pull any remaining stitches with a pair of tweezers.
- Flip to the back of the fabric if a stitch won’t come out easily; it’s likely you didn’t cut all the way through a stitch.
- Take out just the satin stitches if you’re dealing with a multi-layered piece of embroidery.

- Repeat the procedure until all of the embroidery has been extracted. Break through further stitches from the back of the fabric. Take out the threads by turning to the front of the clothing.
- Continue with the running stitches and decorative stitches if you’re working on a multi-layered piece of embroidery. Last but not least, finish with the main stitches.
Method 3
Fading Stitch Marks

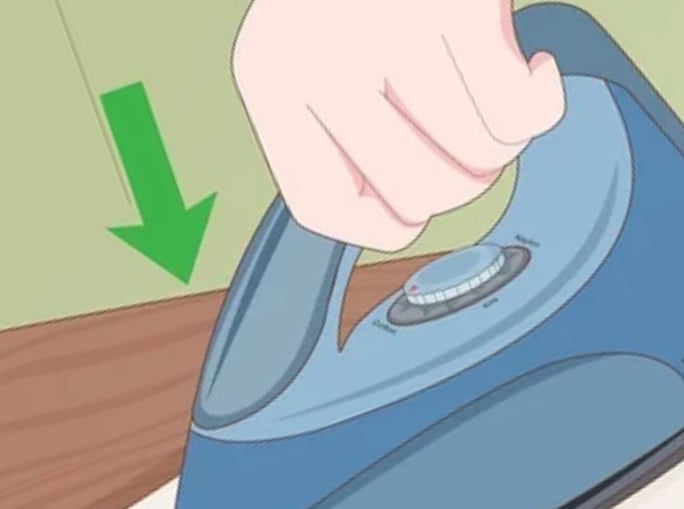
- Use the proper setting to iron the fabric’s front. Your iron’s heat setting will be labeled either by temperature or by fabric form. Choose the one that best compliments your fabric. For example :
- For cotton or linen, use a hot setting. And for silk and synthetics, use a cool or warm setting.
- Choose the “cotton” setting if you’re dealing with cotton and your iron is labelled by fabric form.

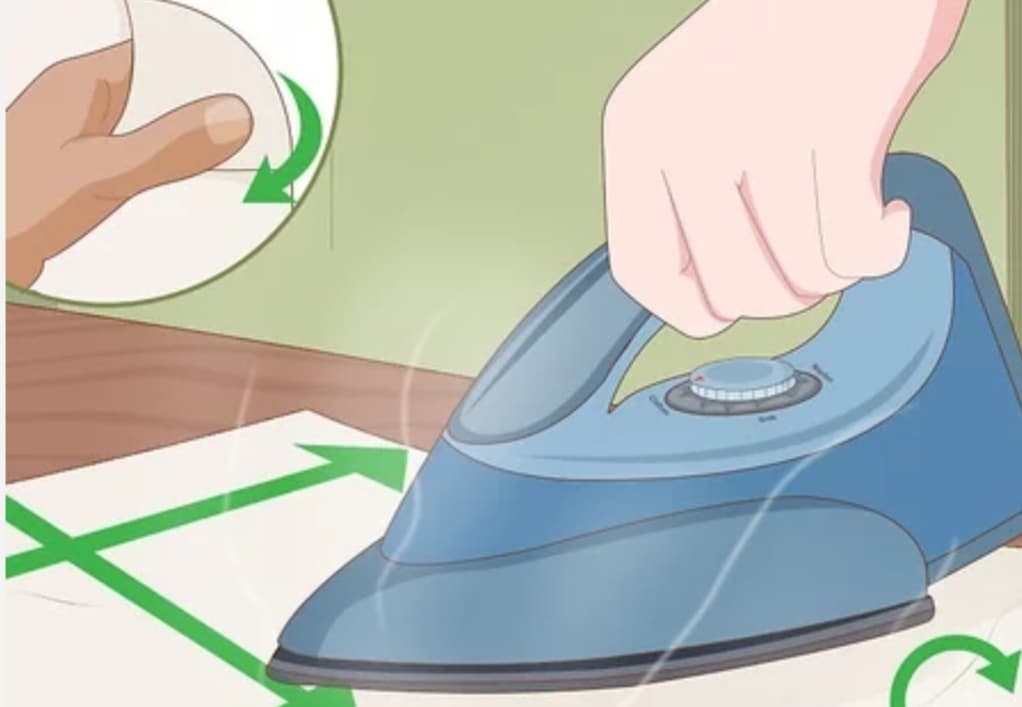
- Rub the stitch traces with your nails horizontally. Scrape the fingernail back and forth over the gaps left by the removed stitches. You can only do it for 2–3 times.
- Firstly work on top of a table or other on flat surfaces.
- You may also use the tip of a spoon.
- When dealing with silk, be gentle because it is prone to tearing.

- Scrape your fingernail over the stitch marks vertically. Just the vertical threads were closed as you scratched the holes side to side. Further scratching them vertically (from top to bottom) can tighten the horizontal threads.
- Don’t be tense if the holes don’t close immediately.
- If necessary, press the fabric with an iron and repeat the process. Use the required heat setting when ironing the fabric. Scrape your fingernail over the holes horizontally and then vertically. If the holes persist, repeat the procedure one or two more times.
- Don’t be concerned if they don’t absolutely vanish. Similarly you’ll repeat the whole process for the back of the cloth, which should cover any remaining gaps.
- Repeat the ironing and scraping procedure on the other side of the cloth. After that pressing the fabric with an iron, scratch the holes with your fingernail two or three times. Cross the holes horizontally first, then vertically.
- You might need to repeat the steaming and scraping process a few times, just as you did with the front.
Beautiful Connection Group, a women’s clothing manufacturing company does these sorts of embroidery removing works very well. Now hopefully you got the ideas how to remove embroidery.