Matthew 6: 10
"Thy kingdom come, Thy will be done on earth, as it is in heaven."

Search
Close this search box.

September 2021

how to paint on fabric

How to Paint on Fabrics : Pro Tips for Fabric Painting in 2024

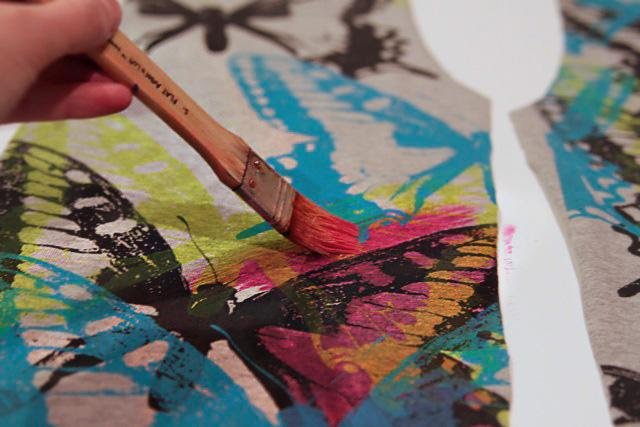
If you are someone who loves painted fabric, you may be willing to know how to paint on fabric. Fabric painting allows you to express yourself via art and creativity on the incredibly diverse medium of fabric and textiles. Fabric painting has a number of advantages. It lets you personalize clothing, wearable fabrics, upholstery fabric, and other crafts.  The majority of fabric painting is done with paint designed specifically for fabrics. Apart from that, there are just a few techniques that distinguish fabric painting from other types of paintings, such as those on paper or canvas. Nonetheless, there are a few things to keep in mind to help you preserve your fabric painting and discover your personal style.  GENERAL TIPS SUITABLE TEXTILES Woven, knitted, felt, terry fabric, silk, velvet, velveteen, corduroy, flannel, suede, leather, and most synthetics.  BEFORE YOU START DRYING TIME Depending on the surface, application, and humidity, it varies. In 5 to 2 hours, the paint will be dry enough to touch.  AFTERCARE TECHNIQUES AIRBRUSH/SPRAY APPLICATION MATERIALS Soft Body + Airbrush Medium / Acrylic Ink (straight from bottle)  DIRECTIONS BLOCK PRINTING MATERIALS Matte Varnish, Heavy Body Acrylic, Slow-Dri Gel Additive.  DIRECTIONS DON’T FORGET TO PREPARE YOUR FABRIC Before painting with most fabric paints, you must first prepare the fabric. This is a critical phase in the painting’s preservation. After all, you don’t want to spend all that time and effort painting a piece you enjoy just to have it peel off or fade.  The fabric paint you use will determine your preparations. This implies that the directions for that specific paint brand will be the finest source of information for the specific preparations you’ll need to undertake. The fabric must be pre-washed at all times. Chemicals and starches that may have remained in the fabric during manufacture. And transportation can be removed by pre-washing. While pre-washing, avoid using fabric softeners of any kind because they will reduce the fabric’s absorbency.  You’ll want to iron the fabric once it’s been washed and dried. Wrinkles will make painting your designs more challenging. Additionally, prepare the area by making a clean work area for yourself. Make sure you provide a barrier between the different layers of fabric when painting. Use a barrier between the two layers if the fabric has a front and back, such as a t-shirt, to protect the paint from soaking through. DO USE YOUR FAVORITE PAINTING BRUSHES AND TOOLS TO CREATE YOUR PREFERRED EFFECT Fabric paint is generally formulated similarly to acrylic paints, which means you have a number of options for tools and brushes.  While your standard acrylic brushes such as round and flat brushes would suffice, you may want to experiment with other tools as well. Rubber stamps, towels for texture, finger painting, palette knives, and any other tools that come to mind are all good options.  DON’T START PAINTING WITHOUT A PLAN When it comes to designing a final product, sketching a design ahead of time and even rehearsing on fabric scraps can help you avoid costly mistakes. It’s crucial to plan out your design and strategy ahead of time, just as with any other piece of art. DO USE GENERAL PAINTING TECHNIQUES Many of your typical painting techniques for bringing a pattern or shape to life can work with this paint, but it may be a little rougher or more absorbent than you’re used to. This means you can layer your paints, practice shading and highlighting to create depth, and add finer details within reason.  DON’T BE TOO SPARING WITH YOUR COLOR MIXES It’s usually a good idea to mix a lot of colors at once when mixing colors for fabric painting. This is because unprimed cloth is more likely to absorb paint than primed fabric. As a result, it’s a good idea to mix your paints freely so that you have enough of a color blend. It’s also a good idea to fill your brush with paint so your strokes don’t dry out too quickly.  DO PRACTICE AND EXPERIMENT There are many techniques for fabric painting, including free-painting acrylics. Different fabrics will accept, absorb, bleed, or react to your usual paint in different ways. Testing is a crucial step, considering that different formulas of fabric paint will react very differently to the same fabric. DON’T BE IMPATIENT WHEN THE PAINT IS DRYING If you’ve painted fabric while wet or if you have many layers of paint, this could take a while. Different fabric paints will have different requirements for finishing the painting process. Other kinds of fabric paint might require a cool rinse, once the paint has dried completely. You can get beautiful, long lasting, good quality and customized painted fabric from Beautiful connection group. Beautiful Connection group is one of the best clothing manufacturers in the USA who produce any kind of garment products for women. 

How to Paint on Fabrics : Pro Tips for Fabric Painting in 2024 Read More »

sewing pleats

Sewing Pleats : 10 Easy Steps of Sewing Pleats (2024)

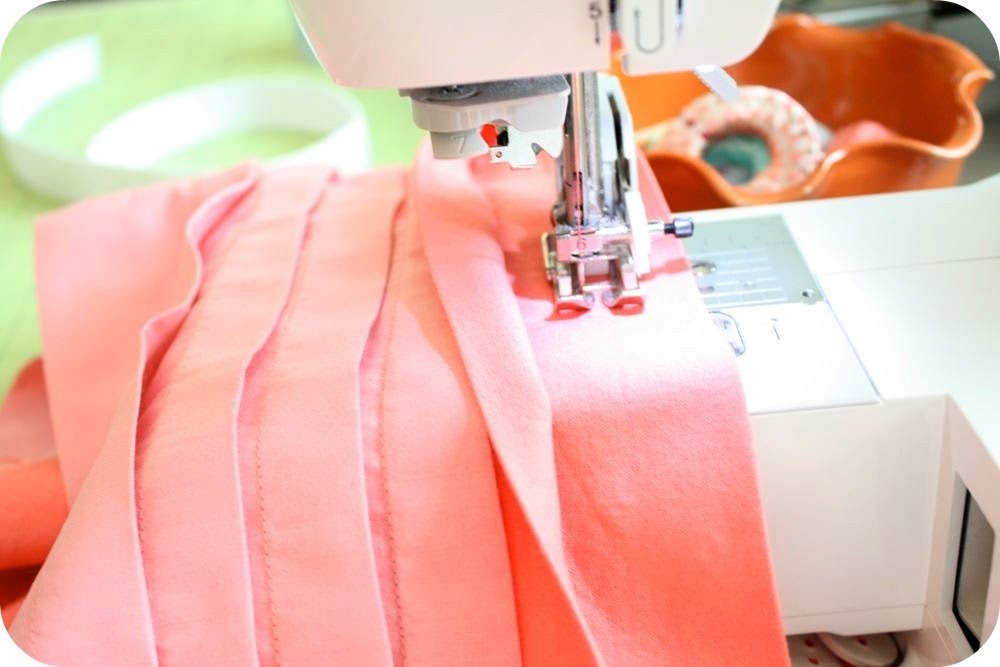
Sewing pleats exist in a variety of shapes and sizes, but sewing pleats always have the same basic structure and design. Pleats, which are frequently used as design features, have a particular effect on the fullness of clothes. Pleats are simple folds that minimize the width of your cloth while still allowing it to move. Consider a traditional pleated skirt that the pleats give the skirt some soft structure while still allowing it to bellow out as you walk.  Pleat Anatomy Pleats have some fascinating jargon that helps you grasp their anatomy, as you’ll see in the movie. Here are a few terms you can start with. Firstly pleat depth is the distance between the pleat’s exterior and inside folds. Secondly pleat underlay equals the depth of the pleat multiplied by two. Thirdly pleat spacing refers to the space between each pleat. Types of Pleats Pleats come in a variety of shapes and sizes, but the five most prevalent forms are described in the video.  Knife pleats have all of the outside folds facing in the same direction. Pintucks are a type of knife pleat; see the section below for additional information on tucks vs. pleats. Accordion pleats are a version of the knife pleat, but with considerably tighter placement—and smaller pleat spacing!  Box pleats have the exterior folds facing in opposite directions, giving them a box-like form.  Inverted box pleats have the features of outer folds that face one another, similar to a box pleat.  Knife pleats are similar to radiating pleats, but they radiate out from a single point.  Have Fun with Pleats Add Box Pleats Box pleats are a timeless style. One per garment would suffice, or you can construct a sequence of box pleats on your skirt or dress. The two folds of a box pleat face away from each other, creating a box-like pleat. This pleat is simple to make, and if your design doesn’t include one, you can easily add one yourself. The Sorbetto top has a classic box pleat, while the Brooklyn skirt has an inverted box pleat.  Create Tucks To avoid offending sewing language purists, the distinction between pleats and tucks is minor and can cause some confusion. Pleats are secured on the top—or the bottom, or both, depending on the style of pleat—but they still have the ability to open. Tucks can be pleated or darted in appearance. Tucks are pleated folds that are completely or nearly completely fastened. A tuck is created by sewing down a portion of the length of a pleat.  Pintucks are a playful, ornamental detail that we can add to any clothing. We show you how to make pintucks on the yoke of a dress in this tutorial from issue 21 of Seamwork. For a textured appearance, pintucks can be placed in pockets, shoulders, and other parts of a fabric.  Tip No. 1 – Pleat does not work with all fabrics  Which fabrics are ideal for pleats?  Pleated fabrics do not look well on anyone. Natural fibers such as cotton, linen, and silk are ideal for pleating. Thin synthetic fabrics (polyester, nylon) may not hold the pleats unless you use a lot of heat. Pleating is difficult with thin sheer and semi-sheer textiles like chiffon unless they are machine pleated.  Pleating chequered and striped fabrics, especially those with symmetrical lines, is the simplest method. These repetitive lines on the fabric serve as instructions for making even pleats by precisely folding the fabric. Some textiles are better for gentle folds (wool), while others are better for crisp pleats (silk) (linen). Pleats can be constructed with bias cut fabric when hanging fabric over a dress form to make a pattern for a very unique draped effect. Tip No. 2 –  Get the right tools for pleating You’ll need a set of marking tools, a set of measurement instruments, and plenty of cloth. Pins are also required to keep the pleat folds in place. Pleating pins are little, sharp pins that are used for, you guessed it, pleating. You may want to stitch the pleats after pinning them to keep them more tight, which will require a hand sewing needle and thread. Pleaters use pleating boards to make clean pleats. This can be purchased and the pleats steam pressed into place. Cut out cardboard pieces of the same size and use them to press the pleats as an alternative.  Tip No 3 – Marking the pleats Pleats are marked with a fold line as well as a placement line. The fold line and the placement line must be parallel. Throughout, we have to maintain this. Pleats are frequently marked on the garment’s right side. However, marking on the reverse may be necessary at times.  Outside of the seam line, use small scissors to snip mark the pleat lines on the seam allowance. This is more visible than chalked-on marks. Crease the fabric along the lines you’ve drawn.  If you don’t want to mark the cloth and want to construct straight pleats, you’ll have to use basting stitches to mark the vertical lines.  We have to place pins vertically along each pleat to keep the folds in place if utilizing pins. Tip No. 4 – Pressing is very important in making neat pleats If you want a soft look, merely press the joining region; if you want crisp pleats, press the entire pleat. This will create the appropriate creases to guide you during sewing. Check that the outside folds and placement lines are staying in the same alignment. Make sure all of the pleats are the same width. You can dampen the fabric and press it in place for clean pleats.  Tip No. 5 –  Baste stitch the folds in place  You can stitch along both the top and bottom edges. Taping the pleats down is an alternative to basting sewing.  Sew along the tops of the pleats, making sure they are not disturbed. Only when all of the sewing has been completed are the basting stitches removed.  Tip

Sewing Pleats : 10 Easy Steps of Sewing Pleats (2024) Read More »

how to make graphic tees

How to Make Graphic Tees : Making Graphic Tees by Using Iron-on T-shirts (2024)

Do you want to learn how to make graphic tees with iron-on transfer paper at home? So, don’t stop reading now! We will be discussing the easiest ways of how to make graphic tees at home by using iron-on transfer paper. Here is the supply list:  Graphic Design Solution: To begin, make a sketch of a design for your t-shirt. To create your t-shirt, you can use a graphic design program like Adobe Illustrator.  Adobe Illustrator, on the other hand, isn’t free. As a result, if you want to develop a simple custom t-shirt design without spending money, you can use graphic design solutions like Canva and PicMonkey than fancier complex programs like Adobe Illustrator.  T-Shirt:  Any plain t-shirt will suffice for this custom print DIY t-shirt, so find your favorite plain t-shirt and let’s get started.  Iron-On Transfer Paper: There are a few things you’ll need for this DIY project, one of which is iron-on transfer paper. You can use Avery fabric transfer paper for this as well.  Here are some of the problems that people may have with Avery Fabric Transfer Paper: Other iron-on transfer paper companies may be worth considering for your own DIY graphic project. Printer: For this DIY graphic t-shirt, you’ll need a printer. A Canon all-in-one color inkjet printer for this job would be great. This printer is one of the most affordable on the market, and it prints, copies, and scans. Overall, it’s not a horrible deal. The iron-on transfer paper, on the other hand, usually can’t  print the t-shirt design very well. Particularly, the black in the custom t-shirt design doesn’t come out with a great output.. Nonetheless, the iron-on transfer paper quality may be a bit dull in the custom print design. So you can’t directly fault the printer until you try different iron-on transfer paper brands.  Pencil: A pencil is not required. Using a pencil, allows you to make a cutting guide, which allows you to gently cut around the design of your fabric without cutting into it.  If you’re concerned about accidentally cutting a part of your custom print design, use a pencil to trace around the image before trimming the excess transfer paper.  Scissors: To clip the surplus transfer paper, use a pair of sharp scissors. Pillowcase: You may get perplexed as to why you would require a pillowcase. After all, this isn’t a custom pillowcase project. The pillowcase acts as a shield between the heat from the iron and the flat surface you choose to transfer the design onto the fabric of your t-shirt’. In addition, the pillowcase gives some padding, which aids in the design’s transfer to the t-shirt. Instead of the pillowcase, you can now use other objects such as a folded flat sheet or a bath towel. In reality, as long as the item provides some padding and covers the flat surface from the heat, it should be fine. Iron: Unless you have a heat press machine, you won’t be able to transfer the design from the transfer paper to the t-shirt without an iron. As a result, add your iron to the supplies list because it’ll come in handy!  Graphic T-Shirts At Home Using Iron-On Transfer Paper Instructions   Step 1: Create And Print The Design Now it is the time to create your personalized t-shirt design with a graphic design solution. It is very simple to make any Halloween custom t-shirt design “Witch Better Have My Candy” using Canva. This design will take you less than ten minutes to complete. You can use other programs, such as Adobe Illustrator or Microsoft Word. It’s time to print your own t-shirt design after it’s been designed. Before printing your t-shirt design on transfer paper, make sure you select the mirror print option in the print window — this is a step you cannot skip. If your printer doesn’t support mirror printing, use your computer’s paint application to flip your custom t-shirt design horizontally.  Step 2: Trace And Trim The Design Using a pencil, trace the design, then carefully trim the excess iron-on transfer paper with sharp scissors.  You can skip tracing if you accept that you won’t cut into the pattern unintentionally. Instead, simply trim the excess transfer paper with a pair of scissors.  Step 3: Select A Flat Surface To Iron Transfer The Design Onto The T-Shirt For transferring the design onto your t-shirt, you’ll need a flat surface. As a result, make your DIY graphic t-shirt on a flat, uncluttered surface.  Tables are ideal for this type of work. However, use a pillowcase or a folded flat sheet to protect the table surface. Because you want to prevent hurting the table’s surface when transferring the design to the t-shirt. Step 4: Iron The T-Shirt To Prepare The Surface For The Transfer Before attempting to transfer the design onto the shirt, iron the t-shirt to generate a heated and wrinkle-free surface that aids in the design transfer. It will remove any moisture that could hinder the design from being transferred to the t-shirt.  Step 5: Iron Transfer The Design Onto The T-Shirt This is the exciting part you’ve been waiting for! It’s time to iron the design onto the t-shirt once and for all. The length of time it takes to iron the design onto the t-shirt is determined on the type of transfer paper used. However, applying enough heat and pressure to the design should help it stick to the t-surface shirt’s readily. Setting the iron to the highest temperature with no stream for roughly four to five minutes should do the trick in terms of time. However, to be on the safe side, follow the brand’s guidelines to ensure you have the best chance of making the best DIY custom t-shirt print possible. Step 6: Let The T-Shirt Cool Down For A Few Minutes After ironing the image onto the t-shirt, all you have to do now is peel the transfer’s paper backing away to reveal your masterpiece! You must resist

How to Make Graphic Tees : Making Graphic Tees by Using Iron-on T-shirts (2024) Read More »

wholesale fabric supplier

Wholesale Fabric Supplier : Fabric Sourcing Ideas for Clothing Line in 2024

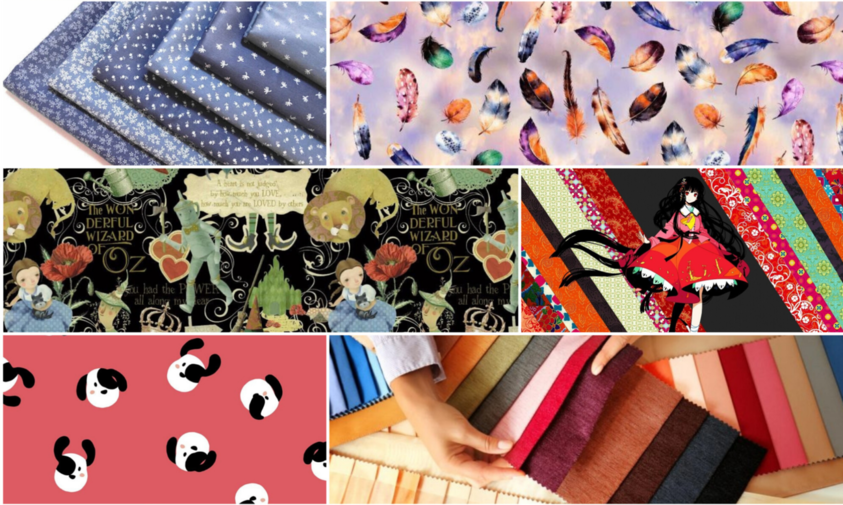
If you are new in the clothing business, you must have knowledge about the wholesale fabric supplier. You can get your desired product from your wholesale fabric supplier. In this article, you will learn what factors you should keep in mind while finding and working with wholesale fabric suppliers. To know the details go through the whole article carefully.  The Basics of Fabric Construction  Understanding how fabric is made and what type of cloth is ideal for the product you’re designing is an important part of the design process. Knits and wovens are two of the most prevalent fabric construction types, however there are many others.  Knitted Fabric Knitted fabrics  are often light, soft, and require little maintenance to maintain their appearance. Knits are a more popular fabric because they resist wrinkling. Knitted fabric is commonly used to create soft, comfy tops, bottoms, crop tops and underwear. Their elasticity makes them ideal for active wear.  Woven Fabric  Woven fabrics are created by weaving two or more sets of yarns at right angles to each other using a machine known as a handloom or power loom. Opacity, abrasion resistance, and pill resistance are all common features of woven materials. The thread count indicates the quality and strength of the fabric. Denim and formal slacks, button-down shirts, and jackets are all examples of woven garments.  Types of Fabric Suppliers  Finding dependable fabric suppliers is an important part of launching a clothing brand. It’s best to locate partners who can ensure that you get the stock you need and that it arrives on schedule. Fabric suppliers are classified into three categories based on how they operate and the types of fabrics they stock.  Where to Source Fabric for Your Clothing Line  Fabric can be purchased in person at fabric trade shows, allowing you to inspect and feel the fabrics. Fabric vendors can be found online, and you can order fabric hangers (also known as swatches or samples) to inspect in your studio or workplace. Depending on the fabric mill, you may be charged a cost for each fabric hanger, which is normally between $5 and $10. Source Your Fabric at Trade Shows   Fabric trade shows can be difficult to navigate. Hundreds of rows of supplier booths is a lot to take in only a few hours. Before the trade exhibition, do some research on the fabric mills that will be present and produce a top ten list. Allow for a few more minutes in case you come across fabric vendors that weren’t listed in your web search. Beautiful Connection Group is one of the best fabric manufacturers in the USA. They are better for small-batch fabric orders. They take part in trade shows as well.   Source Your Fabric Online  If you are unable to attend a fabric trade show, the next best alternative is to browse trade show websites for fabric suppliers who suit your criteria. Many, if not all, fabric companies now have a fabric catalog available on their internet. You can look around at your leisure before ordering fabric headers (also known as hangers) to review in the comfort of your own office.  Commonly Asked Fabric Sourcing Questions While sourcing fabric for your clothing line, here are ten questions to ask fabric providers. 1. Fabric article or item number Fabric hangers frequently include the fabric article number on them. This is the number you’ll need when ordering the sample and bulk fabric yardage. 2. Fabric weight The weight of the fabric is expressed in grams per square meter (GSM or GR/M2). The following are some samples of fabric weights used in various knit clothing. Please keep in mind that these fabric weights are only suggestions based on personal experience. The fabric weight you select for your clothing line may vary. 3. Fabric content The composition of the fibers used to knit or weave the cloth is referred to as fabric content. Rayon, cotton, polyester, and silk are all common fibers.  4. Fabric construction Fabric building entails the transformation of yarns. And in certain cases, fibers into a fabric that is then utilized to create a finished product. The materials and processes used to make the fabric determine the cloth’s qualities. Interlacing technologies such as weaving or knitting are currently used in the majority of fabric production.  5. Fabric width (total and cuttable) Fabric width is the measurement from edge to edge across the width of the fabric roll. The providers should give you two points of measurement (if they don’t, request it). The entire width and the cuttable width are the two dimensions to consider. Because you can skew the fabric’s edges or torn during manufacture and transit. So we’ll recommend to use the cuttable width to get a more accurate measurement of usable fabric.  6. Fabric price per yard/meter (sample yardage and bulk yardage) You can ask the fabric supplier for their sample and bulk price per yard. The cost per yard for sample fabric can be $3-$5 more and in some cases double the bulk yardage price. Buying fabric in bulk usually costs less than purchasing sample yardage.  7. Minimum Order Quantity (MOQ) MOQ refers to the minimum amount of fabric yardage that you must buy per order from a supplier. For example, if a supplier requires an MOQ of 500 yards, you must purchase at least 500 yards to be able to deal with that supplier. In some cases, the fabric supplier will allow you to order less by applying a surcharge to the price per yard.  8. Fabric delivery lead time The fabric delivery lead time is the time between placing a fabric order and the completion of the production and delivery procedure. The delivery lead times may vary from four to eight weeks. 9. Country of origin The country of origin, or COO, is where the cloth is manufactured and shipped from. It’s critical to get this information because it must appear on the inner label of your clothing and will influence the price of

Wholesale Fabric Supplier : Fabric Sourcing Ideas for Clothing Line in 2024 Read More »