Fabric Wreath: How to Make a Fabric Wreath in 2024
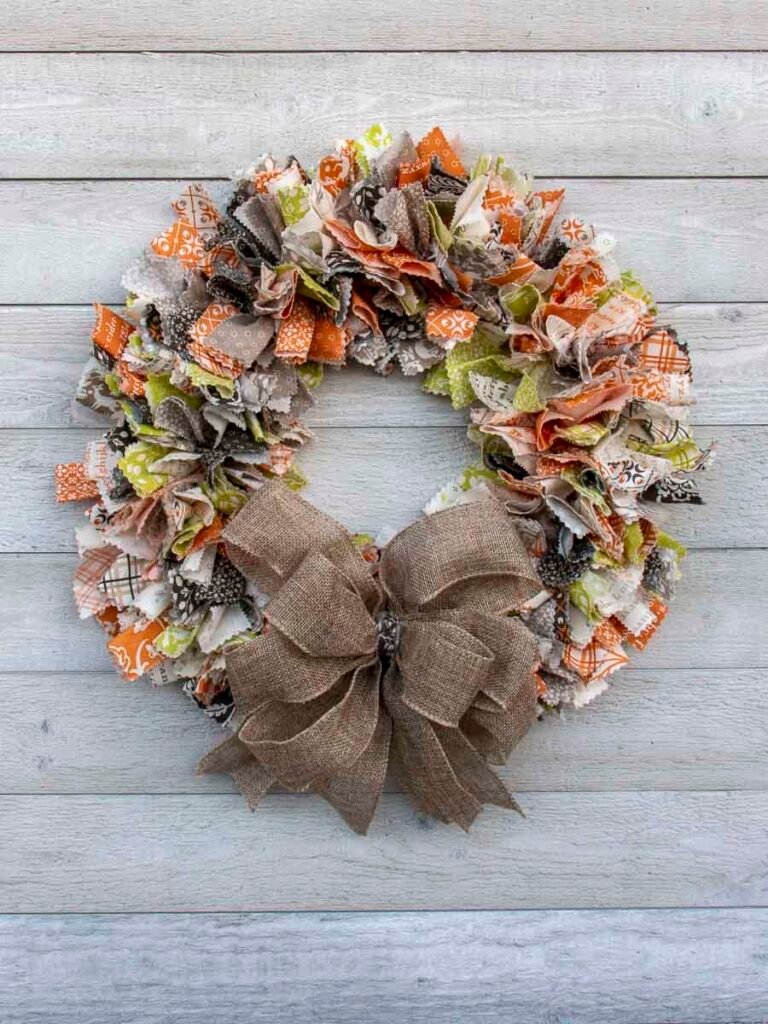
Fabric wreaths are very fashionable nowadays. For any holiday or summer outing, fabric wreaths fit with every outfit. Making fabric wreaths is very easy. You can easily make your own matching fabric wreath at home by yourself. Making a fabric rag wreath is quite simple. By selecting different fabric colors and patterns, you can customize it to fit different occasions and seasons. What Fabrics You Should Choose For The Fabric Wreath There are no restrictions on the type of fabric you are using. But it is better to start with a cloth jelly roll to make the decision easier. You might be wondering what a jelly roll is. It is a package of precut, 2.5″ wide by 44″ long fabric strips. The bundle of fabrics includes appropriate colors and patterns because the fabric often comes from a designer’s collection. You can save time by using a jelly roll instead of searching for matching materials or cutting the cloth into long strips. Jelly Roll Making fabric wreaths is a great way to utilize your stash of fabric pieces. You can also build this wreath using used clothing or linens rather than brand-new material. Do you have a crimson tablecloth, a white t-shirt, and some worn-out jeans? Don’t discard them. You can use them. Fabric Cutting We had to cut the 44-inch fabric strips from the jelly roll into smaller pieces. To make it more precise, we cut almost 200 2.5′′ by 8′′ rectangles. We cut the cloth with pinking shears, but you could also use standard scissors or a rotary cutter. To clarify, a pinking blade contains serrated teeth for sawtooth or zigzag cuts in the fabric. Sawtooth stitching reduces fabric tearing. The fabric strip’s pattern also gives the finished wreath more dimension. Assembly of the Wreath The easiest part of making the wreath is assembling it. Firstly, fold the rectangle of fabric lengthwise in half. Secondly, use a simple overhand knot to tie the fabric to the frame (like tying your shoes). However, the amount of fabric in the jelly roll caused us to decide that a 12″ frame would achieve the desired fullness. So, you will need more fabric if you use a larger frame size. You will need less fabric for a smaller frame. To help with instructions, we have numbered the rings 1-4 from outer ring #1 to inner ring #4, starting at the outer ring. In this frame, we knotted three rows of knots, each created over two rings (see image above). After that, we knotted the fabric over rings 1 and 2 for the outside row of fabric knots. Over rings 2 and 3, which were the knots in the middle row. Over rings 3 and 4 was where the inner row of knots was tied. When crafting this wreath, you will tie a lot of knots. We made sure the ends faced forward after tying each knot, then fluffed the wreath up. It was ready to hang after we added a ribbon. Making a Fabric Wreath: Step-by-Step Instructions Materials Tools First, Select The Fabric Choose a fabric with a range of matching colors and designs. It’s simple to use a jelly roll of matching fabrics to do this. Stripe the Fabric (If Not Using Pre-Cut Fabric) Using scissors or a rotary cutter, cut the fabric into 2.5″ wide strips if you don’t have pre-cut strips. Trimming The Ends If necessary, use pinking shears to trim the fabric strip ends so that the edge is clean. Pinking shears can be used instead of regular scissors or a rotary cutter to reduce fraying. With the shears, we discovered that we could cut a stack of four to five pieces simultaneously. By reducing the number of cuts, stack cutting speeds up the process. Cutting the fabric strips into 8″ segments Pinking shears are used to cut the fabric into 2.5′′ by 8′′ rectangle pieces. We typically measure 8′′ strips with a piece of cardboard that is 8′′ in diameter. You can also use the grid on your cutting mat, a ruler, or a tape measure. Organize and Cut Fabric Strips The wreath requires roughly 200 pieces of cloth. Arrange the pieces into stacks according to color. When fastening the parts to the frame, it is now easier to grab the pieces. Don’t attach two similar pieces of fabric together next to each other. Half-fold The Fabric Strip Place the fabric’s wrong sides together with the right sides facing out as you fold the rectangle piece in half lengthwise. To assist with crease formation, run your fingers down the fold. Thread The Folded Strip Through The Outer Two Rings Take the folded fabric and pass it through Rings 1 and 2 as you do so (the outermost rings on the wireframe). Wrap The Material In An Overhand Knot Make an overhand knot by crossing the two ends of the fabric and pulling one end through the loop. Pulling The Ends Tight Pull the two ends together and tie a tight knot. A single knot will work just fine instead of a double one. Continue To Wrap The Entire Frame In Knots Over the two outer rings, tie another knot using a contrasting piece of fabric (such as one that is lighter or darker or has a different design). After that, continue making knots around the entire frame, crossing the two outer rings. The six parts of a 12″ frame (the areas between the crossbars). For a total of 66 knots on the outside row, we tied 11 knots in each area. Knots On The Second Row Over rings 2 and 3, tie a second row. Put the knots on the outer row in between the outer row knots. For a total of 60 knots, we tied 10 knots in each segment of the middle row. Add A Third Row Of Knots To create the last row, tie knots over rings 3 and 4. After that, place knots on each side of the main row of knots (similar
Fabric Wreath: How to Make a Fabric Wreath in 2024 Read More »