For fashion-conscious people, it is a common question, “How to make embroidery patch?”. Because many of them try to make different outfits at home. So they want to know how to make embroidery patch so that they can make it by themselves.
What is an Embroidery Patch?
An embroidered patch, or cloth badge, is a piece of embroidery that is created by stitching thread and fabric together. The art of producing embroidered patches is an old tradition. And, they did it manually. They used Schiffli embroidery machines during the first half of the twentieth century. Mass production is now possible with computerized machines.
They can attach the patch to a fabric surface using a number of methods. In addition to stitching on embroidered patches, more modern methods include ironing them on, using a dryer’s heat-activated adhesive, and using Velcro backings.
Military and other uniformed personnel use embroidered patches to identify themselves. These patches trace their origins back thousands of years to ancient cultures in the Mediterranean. The Middle East, China, India, and South America. Elaborate embroidery patterns were used to embellish royal robes and religious artifacts.
Many people use embroidered patches to distinguish ranks, jobs, specific positions, or specialized units. Today, government organizations (including uniforms of the military, emergency services, and other specialized workers), sports teams, and companies in the private sector use embroidered patches as well. Furthermore, sports teams, scouting groups, and specialized youth clubs often wear clothes with embroidered patches. Space agencies also use them on astronauts’ uniforms to indicate their missions. And many people collect patches too.
How to Make Embroidery Patch DIY
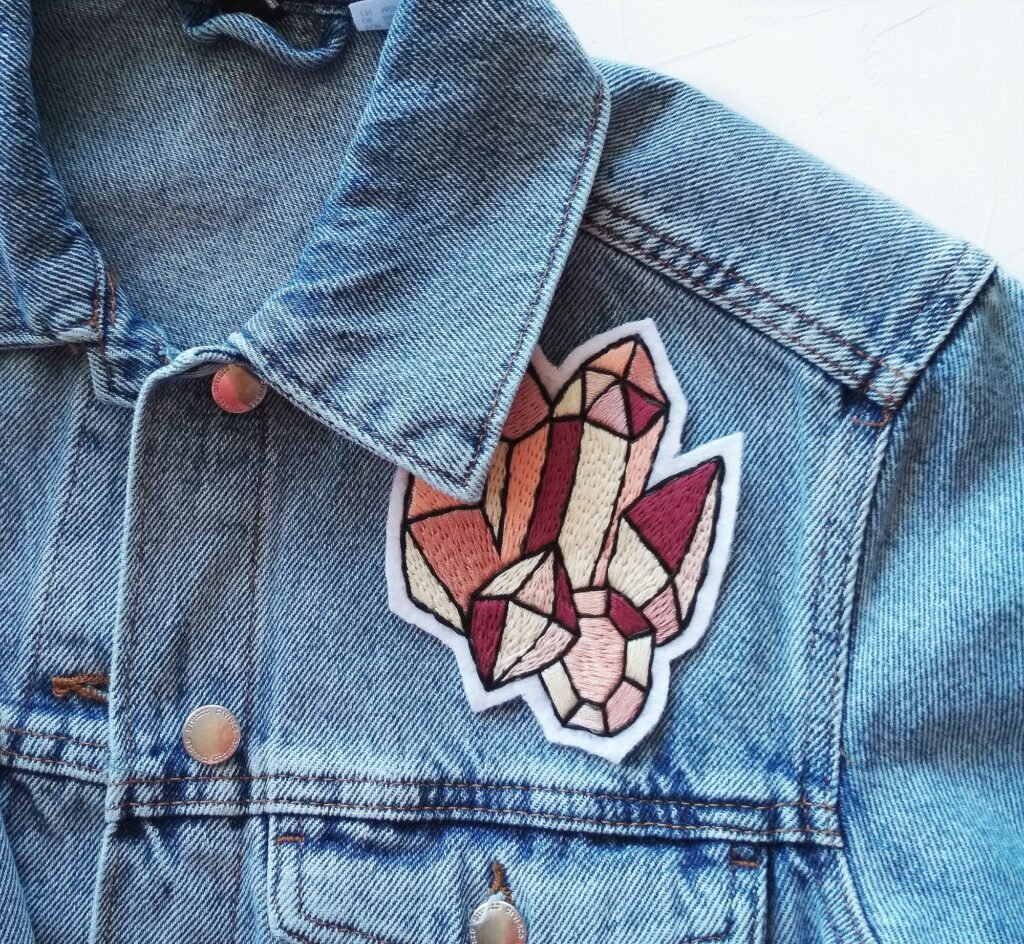
Patches are a fun and well-liked way to dress up your favorite denim bag or garment. It’s simple to produce homemade embroidered patches. You can make any type of embroidered patch and can customize them to your exact specifications. In this article, we will share four techniques for creating and applying your embroidery patches . After that, pick patterns for each of these according to how big you want the patches to be. Pick patterns for each of these. Smaller designs, like the components of a fruit pattern, perform well, but there is no set rule for this.
- Ironing-on Patches
It’s always useful that ironing-on patches are quick and simple to apply. Additionally, these patches are nice as gifts as well. Follow just a few straightforward iron-on instructions.
For that, you’ll need a design, two pieces of fabric, and two pieces of paper-backed fusible web to make iron-on patches.
The Instructions You Need to Follow to Iron-On Patches
- Firstly, pick a pattern, and then mark it using the transfer technique that works best with the cloth you’re using.
- Secondly, stitch the pattern while leaving space at the edges.
- Thirdly, cut two pieces of paper-backed fusible web and a second piece of cloth to the same size.
- Lastly, iron one piece of fusible web onto the piece of fabric without embroidery. Make sure you lay your iron on the paper side and pay attention to the manufacturer’s instructions.
- Ironing On Patches: Fusing the Fabric to the Embroidered Piece

- First of all, place the fabric, web side at down, on the back of the embroidered fabric. And, peel the paper off the fusible web.
- After that, to join the layers together, iron the non-embroidered layer. This increases the durability of your patch and helps keep the edges from fraying.
- Remove the paper before ironing the second piece of fusible web to the fused patch’s plain back.
- Ironing-On Patches: Cutting and Finishing the Patch

Cut around the embroidered shape, following the motif’s lines and leaving some space around it.
Although the fusible web helps with tearing prevention, you can also add an additional layer of protection by sewing a line of running stitch close to the edge. Use whip stitch around the edge in the pin patch technique below to give your patch a more professional appearance. For further security, wait to add the line of stitching after it has been pressed in place if you are connecting this to a frequently washed object.
When you’re ready to apply your iron-on patch, hold it in place and press the iron on the item’s back. Make sure that the heat setting on your iron is high enough to penetrate the layers.
- Felt Sew-On Patches
Due to felt’s resistance to tearing, this patch technique only needs minimal edge finishing. You may be confident that your stitching won’t move because it is also sewed into place.
Making felt patches just requires the felt to embroider on, a marking technique, and thread.
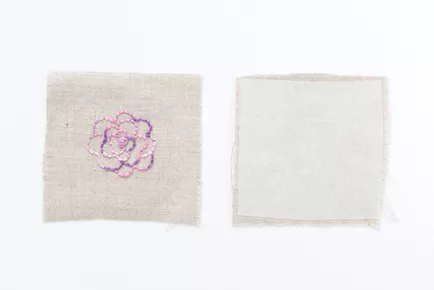
- Use a water-soluble stabilizer or the tracing paper technique to mark the pattern before embroidering on felt. Make sure the embroidery is placed so that there is enough space to cut the patch around the design.
- You can embroider the design in any way you desire. On little patches, satin stitching looks fantastic, but you can also stick to all the outlines.
- Remove the markings after the embroidery is finished. Remove the tracing paper with caution if you employ that technique. If using a water-soluble stabilizer, soak the completed stitches until the substance dissolves, then let the felt dry flat.
When soaking the needlework, it is crucial to use cool or room temperature water if you are using wool or wool blend felt, which holds up the best. Your patch will shrink if you wash it in warm water.
- Cutting Felt

Cut around the needlework to complete the patch. You can cut out a standard shape, like a circle or hexagon, or you can roughly follow the stitching’s shape as shown.
There is plenty of room for sewing the patch onto something because just about 1/4 inch of the felt is visible in the sample. You can, however, cut considerably closer. Just be careful not to trim the felt too closely or clip the stitches so closely that they come out.
- Felt Finishing and Attaching
Pin or hold the felt patch where you want it to go in order to attach it. Use standard embroidery floss to stitch around the edge. As with applique, you can use blanket stitch or whip stitch.
It is not advisable to routinely wash felt patches. Use the gentle cycle or put the patched item in a delicate bag or pillowcase when you do need to wash it.
- Self-Adhesive Patches

Do you want a permanent patch that you can attach like a sticker? You need this method.
In order to create self-adhesive patches, you will need the fabric you will stitch on, a heavy stabilizer, and permanent peel-and-stick fabric adhesive.
You can stitch your pattern on any fabric you like. Designing the fabric on the bias will prevent the fabric from fraying excessively.
Place your embroidery hoop on a stiff, heavy piece of stabilizer and layer it behind the fabric. Stitch the pattern through the two layers. A strong needle is necessary in order to pass through the stabilizer.
- Cutting Self-Adhesive Patches and Finishing the Edges
Trim the fabric around the stitched shape, leaving a little border so you can stitch the edges. Cutting more geometric forms is better for this method of patchmaking.
Use a whip stitch or blanket stitch to sew around the patch’s perimeter.
- Attaching Self-Adhesive Patches
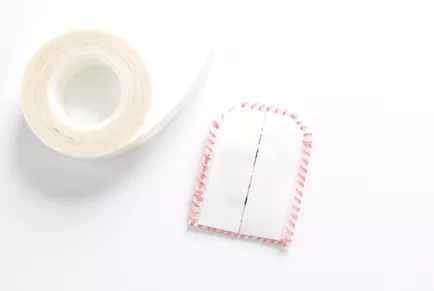
On the patch’s back, use permanent peel and stick fabric adhesive. As shown, this substance is available in sheets or on a roll. Cut strips or a single piece to fit the patch inside the stitched edges.
Press the patch onto your backpack or even a notepad after removing the self-adhesive covering. Just keep in mind that this kind of adhesive is permanent, making it difficult to remove your patch.
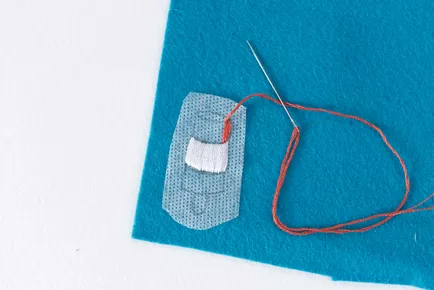
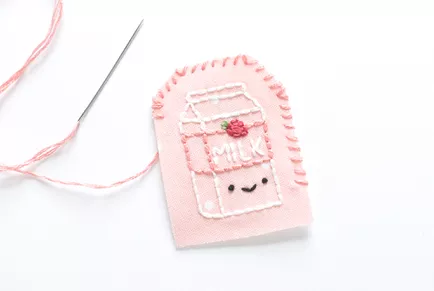
- Removable Pin Patches
You can wear a pin that looks like a badge when you want a patch temporarily. It is also a great way to give gifts.
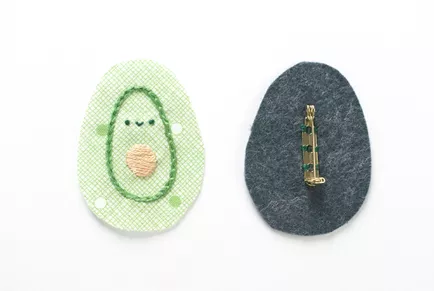
To make pin patches, you will need embroidery fabric, felt, and a bar-style pinback.
- Stitch the design onto the fabric after transferring the embroidery pattern. The fabric here provides some fill color for the embroidery.
- Cut around the stitching, leaving 1/8 inch to 1/4 inch, depending on how much of the edge you want to see. Cut a piece of felt that is the same shape as the embroidered piece.
- On the back of the felt piece, sew a bar-style pinback. Make sure that you’re stitching on the correct side of the felt so that they will match up when the wrong sides of the pieces are facing each other.
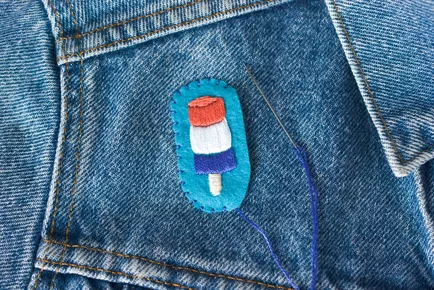
- Finishing the Pin Patch by Removal
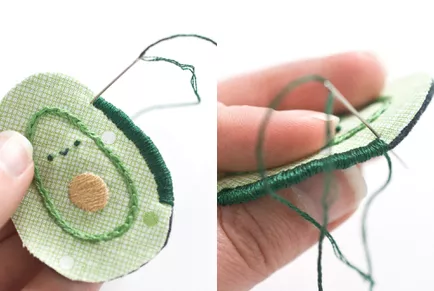
Whip stitch the edge using three strands of embroidery floss while holding or pinning the two layers together. Starting from the back, put the beginning knot between the layers.
Make the stitches extremely closely spaced as you work your way from the front to the back. They need to resemble a satin stitch.
When you run out of thread, cut the thread, tie it off with a knot close to the felt, and then thread the needle through a few stitches on the back. Just as you did before, begin your new thread.
Alright, I hope you understood all the steps. So now you have learnt how to make embroidery patch by yourself. It’s really easy though.
Beautiful Connection Group is one of the best clothing manufacturers in the USA. They manufacture customized clothing for business owners, and they do embroideries as per the client’s demand as well. You will get any customized embroidery design or any type of women’s clothes from them at a very reasonable price. They provide the best quality.