Have you ever wondered how to make bras?
Or,
You might have got a common question in your mind, “How to make bras.”
Bras are the most common clothing item for women. You might be thinking that making bras needs a lot of skills. But, do you know that anyone with basic sewing skills can make bras by herself?
In this article, we will let you know how to make bras. We will share 10 easy steps to making bras. So, to know how to make bras, keep reading this article.
Step 1: Checking the Tools and Materials
The Necessary Materials to Make Bras:
- fabric with at least a side-to-side stretch
- asymmetrical lingerie elastic for edging
- strap elastic
- underwires
- Hooks and eyes
- a little knit interfacing
- Optionally, stretch lace for decoration
- Optionally, ribbon for decorative bows
- Optionally, plastic hardware for adjusting the straps is optional
You can purchase underwires at fabric stores or online. But if you have some old bras that you don’t need anymore, grab the underwires first. Make sure to get the right size of underwire. For that, you need to hold it up under your breast and check that it fits perfectly but without poking into your breast. You can bend them slightly. But they’re actually in the shape of a U, rather than a circular wire, to keep their shape.
Step 2: Pattern

Although bra patterns are available for purchase,, you can make your own one from an existing bra.

There are four pattern pieces:
- upper cup
- lower cup
- side/back
- front stay
The pattern’s most critical features are:
a) how the cup pieces fit together
b) the stretch lines
c) which edges require seam allowances and which do not.
Your fabric will almost certainly stretch in one direction more than in the 90-degree direction. On the cup pieces and front stay, the stretch is most obvious up and down. On the side and back pieces, it will be most apparent sideways. Take a look at the pictures of stretch direction markings.
Except for the top of the upper cup, all cup pieces need seam allowance. You have a couple of options there, see the Cups step. Because the remainder of the edges will be completed with elastic. The side/back piece just needs seam allowance at the edge that attaches to the cups.
We are not including the bra pattern. Because chances are, it’ll certainly not fit you. You’ll have to adjust it anyhow. And, you need to trace it from an existing bra that you know fits. It isn’t much additional work.
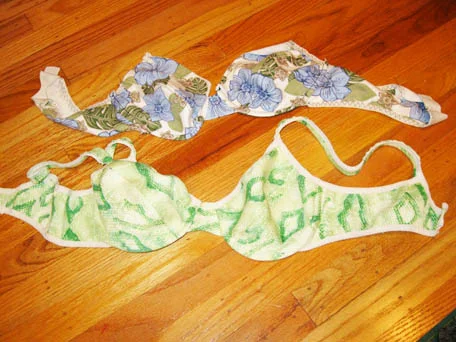
Step 3: More Adjustments to the Pattern
While working out the pattern, we made 1 partial bra and 1 additional complete bra. The green one in the pic below is totally wearable. Although the elastic is so curly, it looks really odd laid out flat.
There are any number of possible adjustments to make, but the most common are the followings:
- You may alter the cup shape by altering the curve of the cup. A minor modification here can go a long way. So, go an eighth of an inch at a time and make sure the lines are smooth. If you need to make a lot of changes here, you’ll probably need to tweak the cup upper as well. You need to make it somewhat longer or shorter. Because of the difference in length between the lower cup edge and the upper cup edge.
- Stay in the center. Depending on how widely spaced your breasts are, you need to make them shorter or longer.
- We wanted the bras to have a little less coverage than full coverage. Therefore, we decreased the cup’s outside edge (but not the inside edge). As a result, we had to make the straps longer to compensate.
- Make adjustments accordingly to your size to the underarm area of this garment.
Step 4: Cut


Make sure you lay out the stretch lines along the stretchiest direction of the fabric. Additionally, you need to cut the center stay on a fold to eliminate one seam. And, cut it by the stretch line in an up and down direction rather than side by side. If your fabric is very stretchy, you might even want to interface it or line it with another non-stretchy fabric for stability.
Step 5: Cups
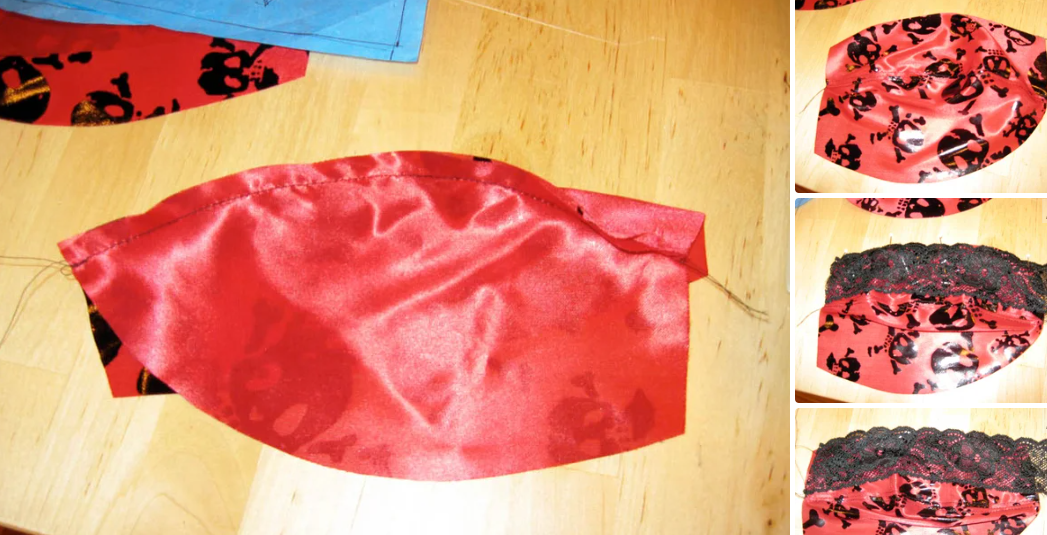
Sew the two cup pieces together in the middle. Make sure that they are aligned appropriately in relation to one another. If your fabric is really delicate, you may want to line the reverse of this seam.
Finish the cup’s top edge in whichever way you like. We used a stretch lace piece here. But you could also use lingerie elastic. In that scenario, you should probably sew the edge seam first, then sew the upper and lower parts together.
The lace should be somewhat smaller than the cup. Sew it on with a little zigzag stitch. Put the lace edge at the top edge of the upper cup piece. Lastly, remove the original fabric piece from beneath the lace. On the other hand, you can even leave it if you prefer the overlay effect!
Step 6: Center Stay

If you did not fold the sleeve/stay, sew it together at the top (and bottom). After that, turn it right side out. Stitch it inside the cups, matching the top edges. The underwire channels will be a full quarter inch. So, leave a very small seam allowance.
Step 7: The Sides
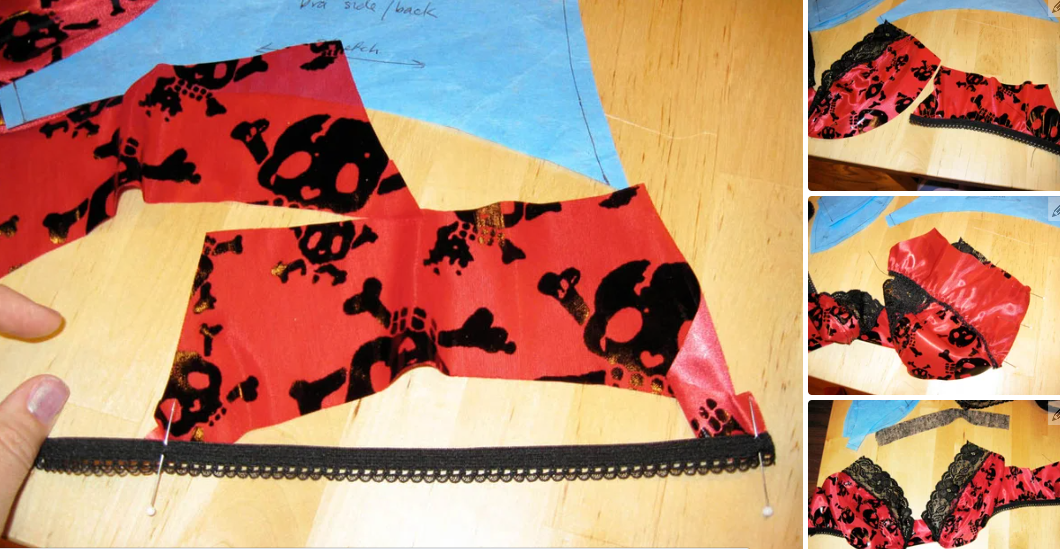
Firstly, put the old bra on the table. Secondly, hold the elastic from the underwire edge around your back until it reaches the other cup edge. Squeeze it as tight as you can. The side panels will have twice the length of elastic at the bottom if you do this. Attach the pieces to the side pieces by pinning the ends and middle. If the elastic is not an inch or two shorter than the side panel, make sure the elastic measurement and the side panel pattern are correct.
To finish, sew the sides to the cups, matching the top edges with a bit less than a quarter-inch seam allowance. Do it as you did with the center front stay.
Step 8: The Underwires
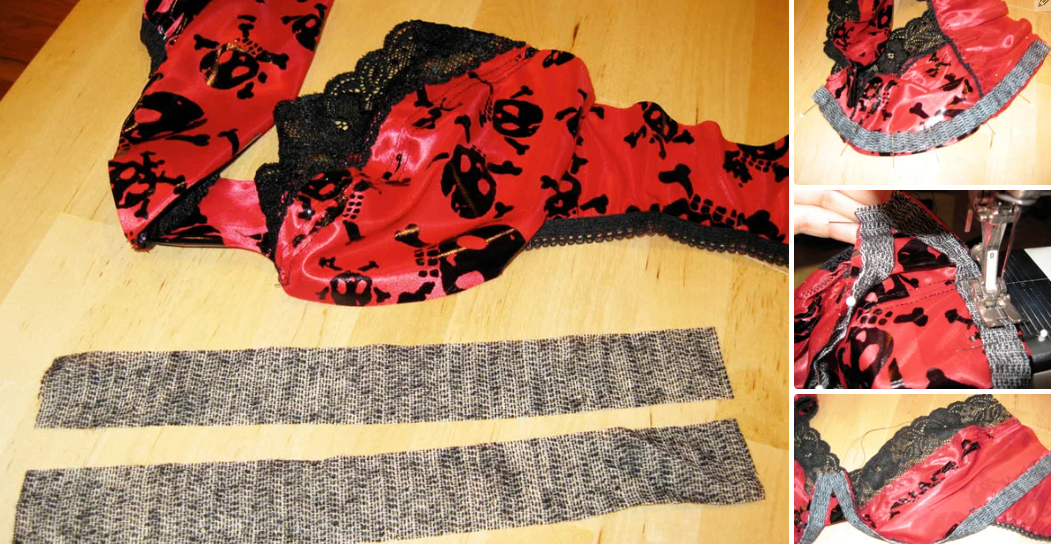
Cut two strips of interfacing one inch wide and the length of the bottom edge of the cups. Fold one in half lengthwise. After that, pin it around the bottom border of a cup, and sides out. As shown in the figure, place it over the front stay and side piece, leaving a little gap next to the seam allowance. Stitch the channel to the edge of the bra cup with a quarter-inch seam allowance. Stitch in such a way that the previous stitching line is hidden.
Now, release the stay and side piece by folding and wrapping the underwire channel around the inside of the bra cup. It should sit a quarter of an inch within the cup and cover all bare edges. Stitch this in place, close to the channel’s folded edge.
To keep the underwires from coming out, sew a bar tack over the end of the channel near the center of the front stay. Now, simply slide the underwires into the channel you created from the outside edge. The underwires are not symmetrical. There is a shorter and a longer end, but the variation is sometimes slight. The longer end should be placed on the exterior edge.
Step 9: Check the Side Elastic and Straps
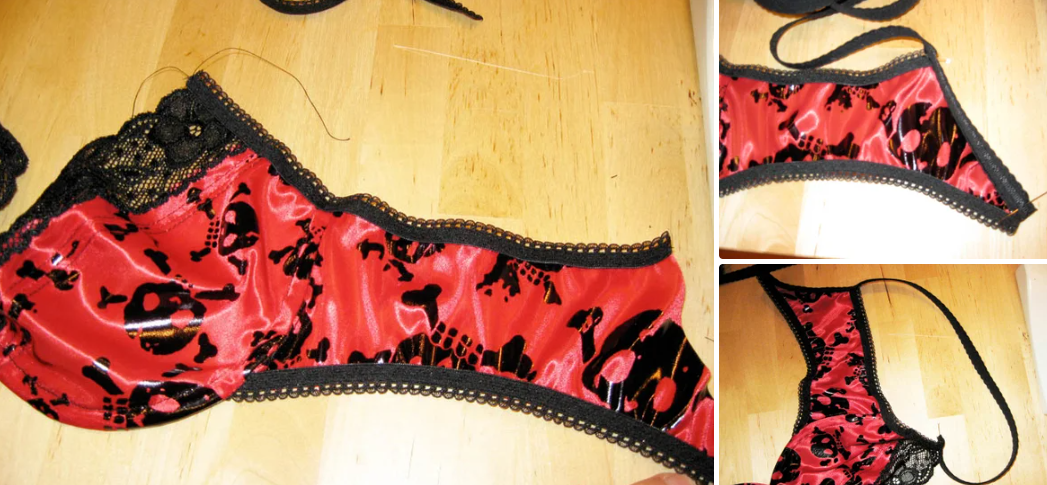
If you’re working on a trial bra or an old one with good straps and hardware, you might be able to utilize those parts. Determine the length of elastic to go from the bra back to the top of your cup around your sides on top of the side piece. Make a note of the length and try stitching it. You can pluck it out and make adjustments as needed.
Step 10: Check the Hooks and Eyes
To begin, cover the raw ends with something soft, such as a piece of T-shirt fabric. After that, sew the hook and eye in the place. You can stitch it either by hand or by machine, leaving an extra tail on the eye end so the hook doesn’t scratch your back.
So, these were 10 easy steps on how to make bras. We hope this helped you. And, now you can make your own bras by yourself.
Alright, besides bras, you can get any type of customized women’s clothing from the Beautiful Connection Group. Beautiful Connection Group is one of the biggest clothing manufacturers in the USA. You can order any customized women’s clothing from them wholesale. They provide the best quality at the most reasonable price.